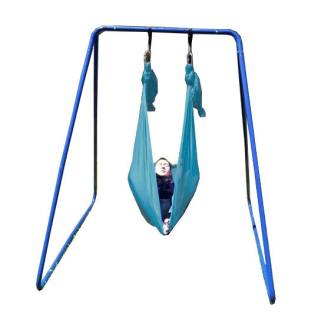
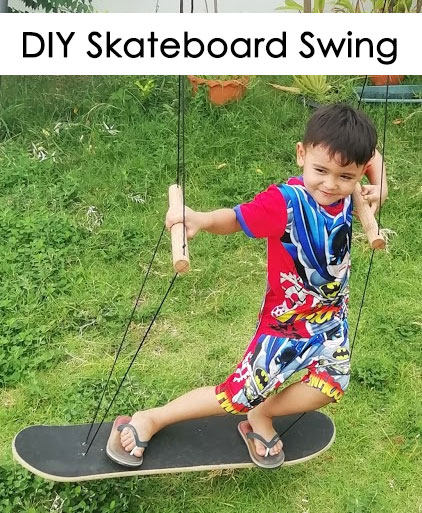
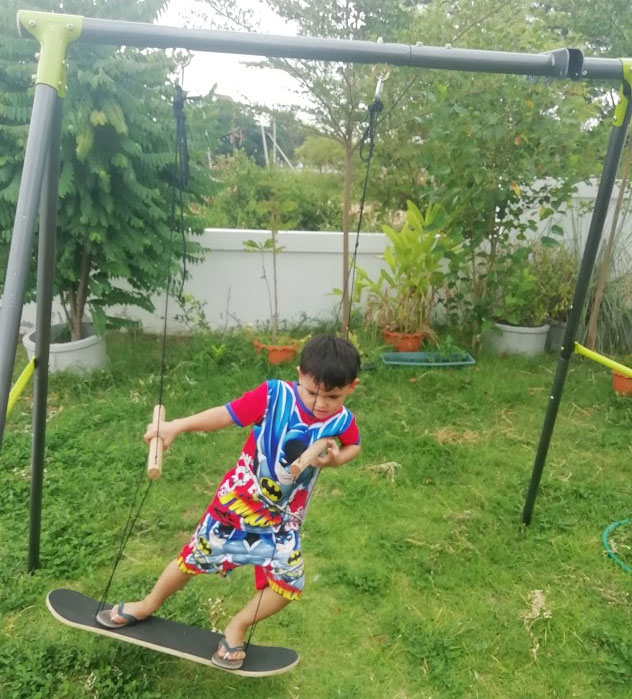
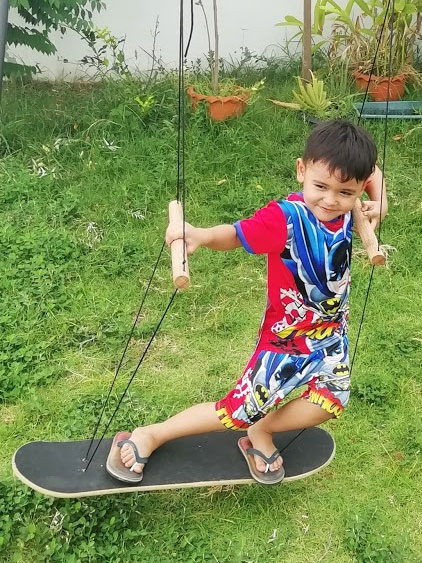
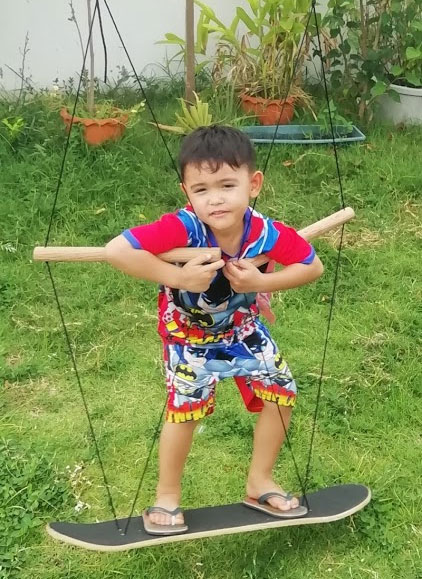
Making a skateboard swing can be a surprisingly easy and cheap DIY project. It can also be a safer alternative to actual skateboarding or surfing for small kids. The 4 year old in the pictures can practice his balance on the swing, without the harder falls of an actual skateboard.
The majority of the parts are things that you might have hanging around already, like an old skateboard and rope.
The most complicated steps are: disassembling the skateboard, drilling holes, cutting dowel, and tying knots in the rope. Nothing too difficult.
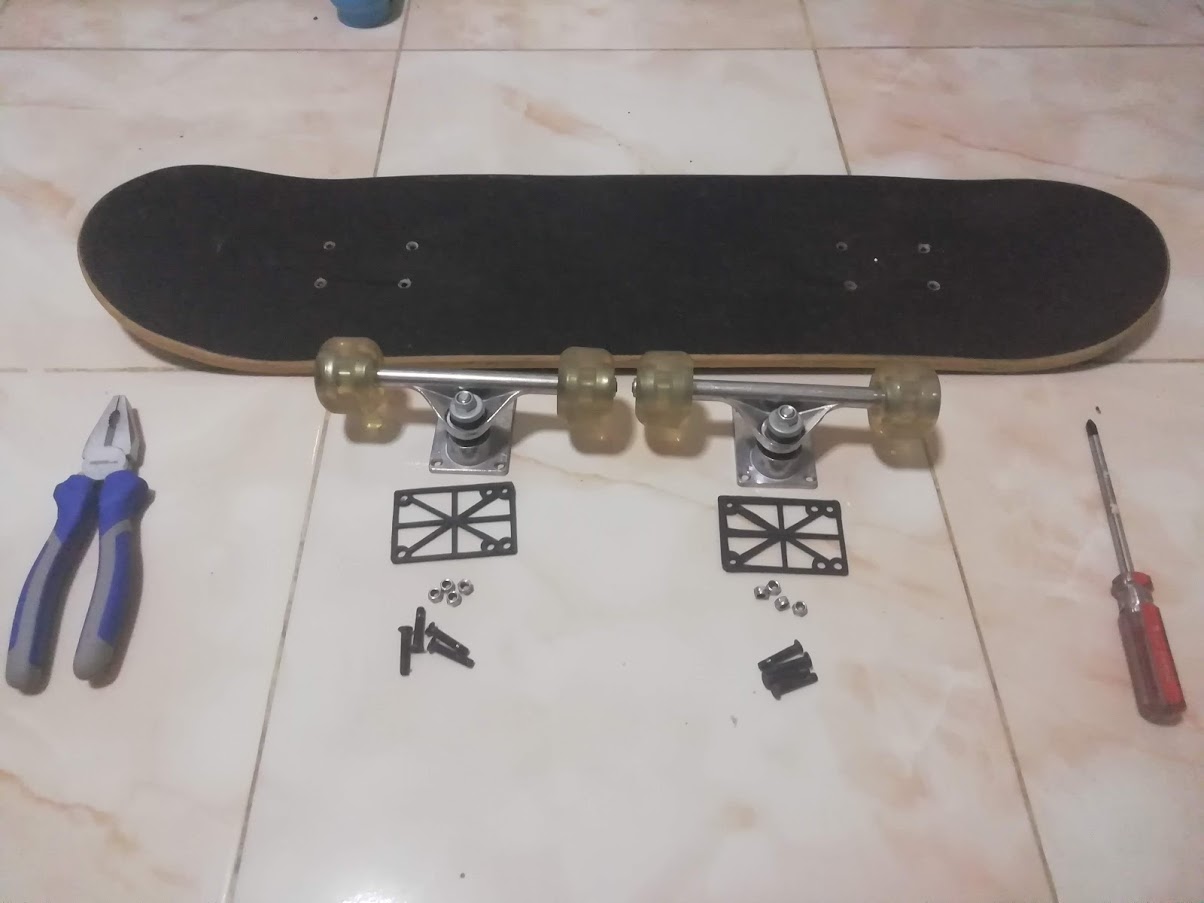
Step 1: Organise the Materials
- Skateboard - Any old one will do.
- Wooden Dowel - About 60cm x 2.5cm. This will be cut in half for 2 handles.
- Wood Drill Bit - It'll need to be large enough to fit your rope through, and sufficiently smaller than your dowel's thickness.
- Rope - I used 4mm paracord, but that was for convenience, and it is only suitable for small children. 6mm+ diameter is suggested, or large enough to suit the weight. 2 lengths of approximately 5.0m.
- Suggested: Carabiners - Having 2 carabiners will make it easy to attach to your swing set or tree straps. I used 5mm diameter, 5cm triangle carabiners. That's about the minimum size you'd want.
Tools Needed
- Electric Drill - For drilling holes in your wooden dowel, and skateboard.
- Clamps - To keep your wood steady when drilling.
- Screwdriver - To disassemble the skateboard.
- Pliers - To disassemble the skateboard.
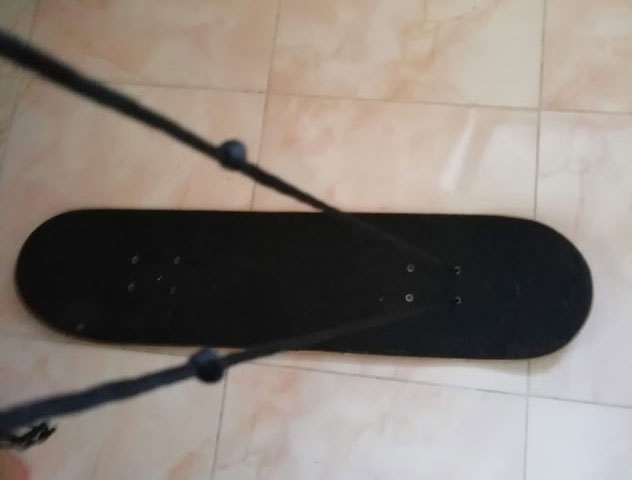
Step 2: Disassemble the Skateboard
Using your pliers and screwdriver, remove the trucks (the wheel assemblies) from the skateboard. Keep them if you ever plan to reassemble it, but hopefully they were coming off a cheap old skateboard. You'll be left with a board with 8 holes.
Step 3: Drill Holes in the Skateboard
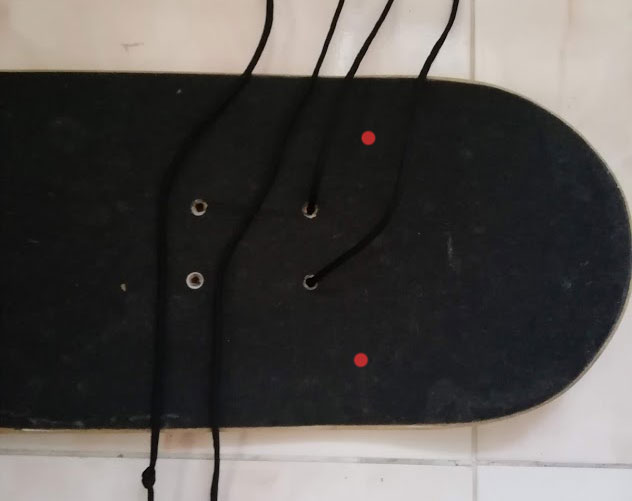
You have a few options. I went with the convenient option and used the existing holes to thread the ropes, but then you end up with a board that it more difficult to balance.
A better option is to drill holes in the board approximately where I've placed the red dots. That way, your ropes will be near the sides of the board, so the board is easier to balance.
If you'd like, you could use putty or wood filler to fill the holes from the trucks.
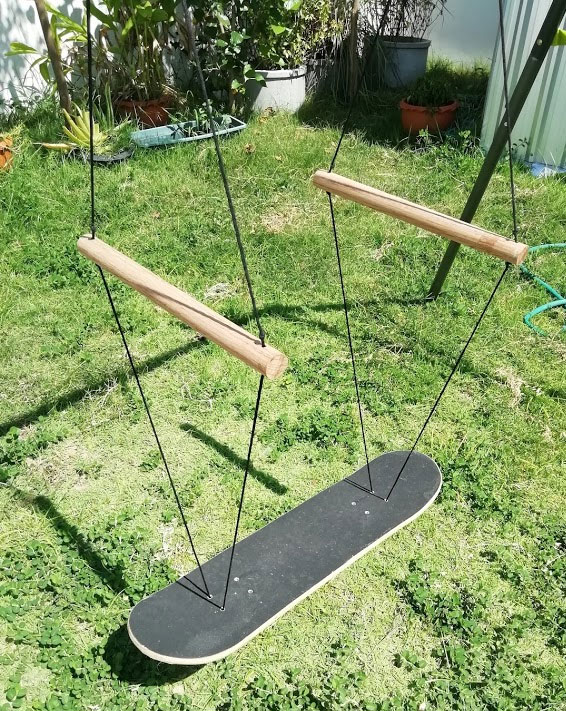
Step 4: Cut and Drill Holes in Your Dowel
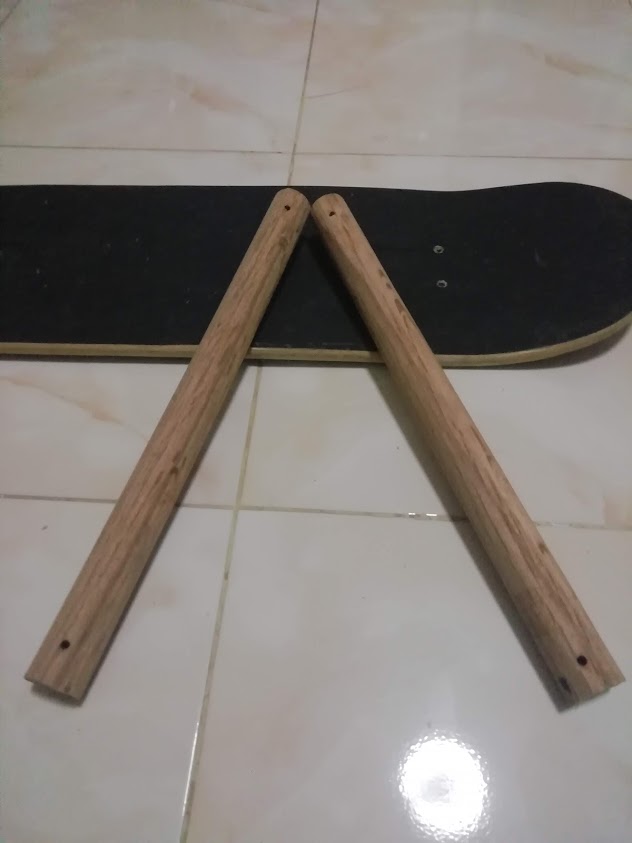
Cut your dowel so it's in 2 pieces of approximately 30cm long. Drill holes near to the ends of both pieces, like in the photo. They should be large enough to fit your rope through.
Step 5: Thread Your Rope
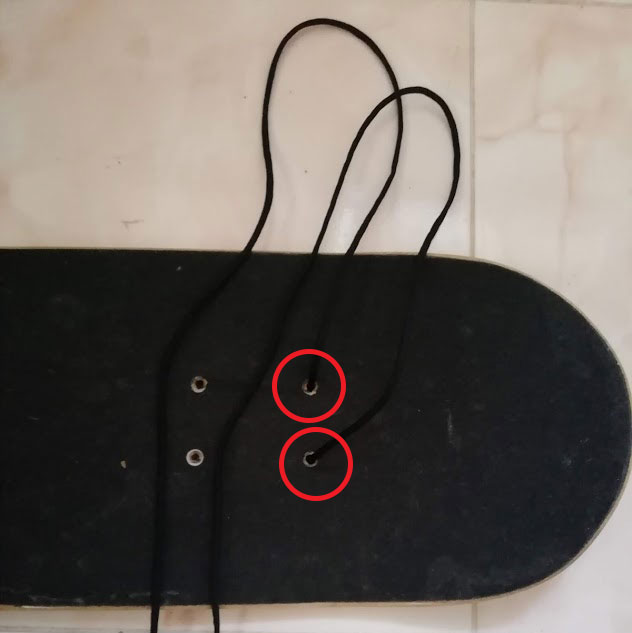
With 1 of your lengths of rope, starting from below the board, pass each end of the rope through your drilled holes. Then tie knots immediately above the holes on the board. That way the rope will stay exactly in position, tightly beneath the board.
Step 6: Knot Your Rope
When you get to the height you want the handles at, tie knots in the rope (so the handle will be fixed above the knots). Thread the dowel onto the rope, then tie knots above the dowel too (so the handles are fixed in place when in use).
Now your board and handles are fixed in place.
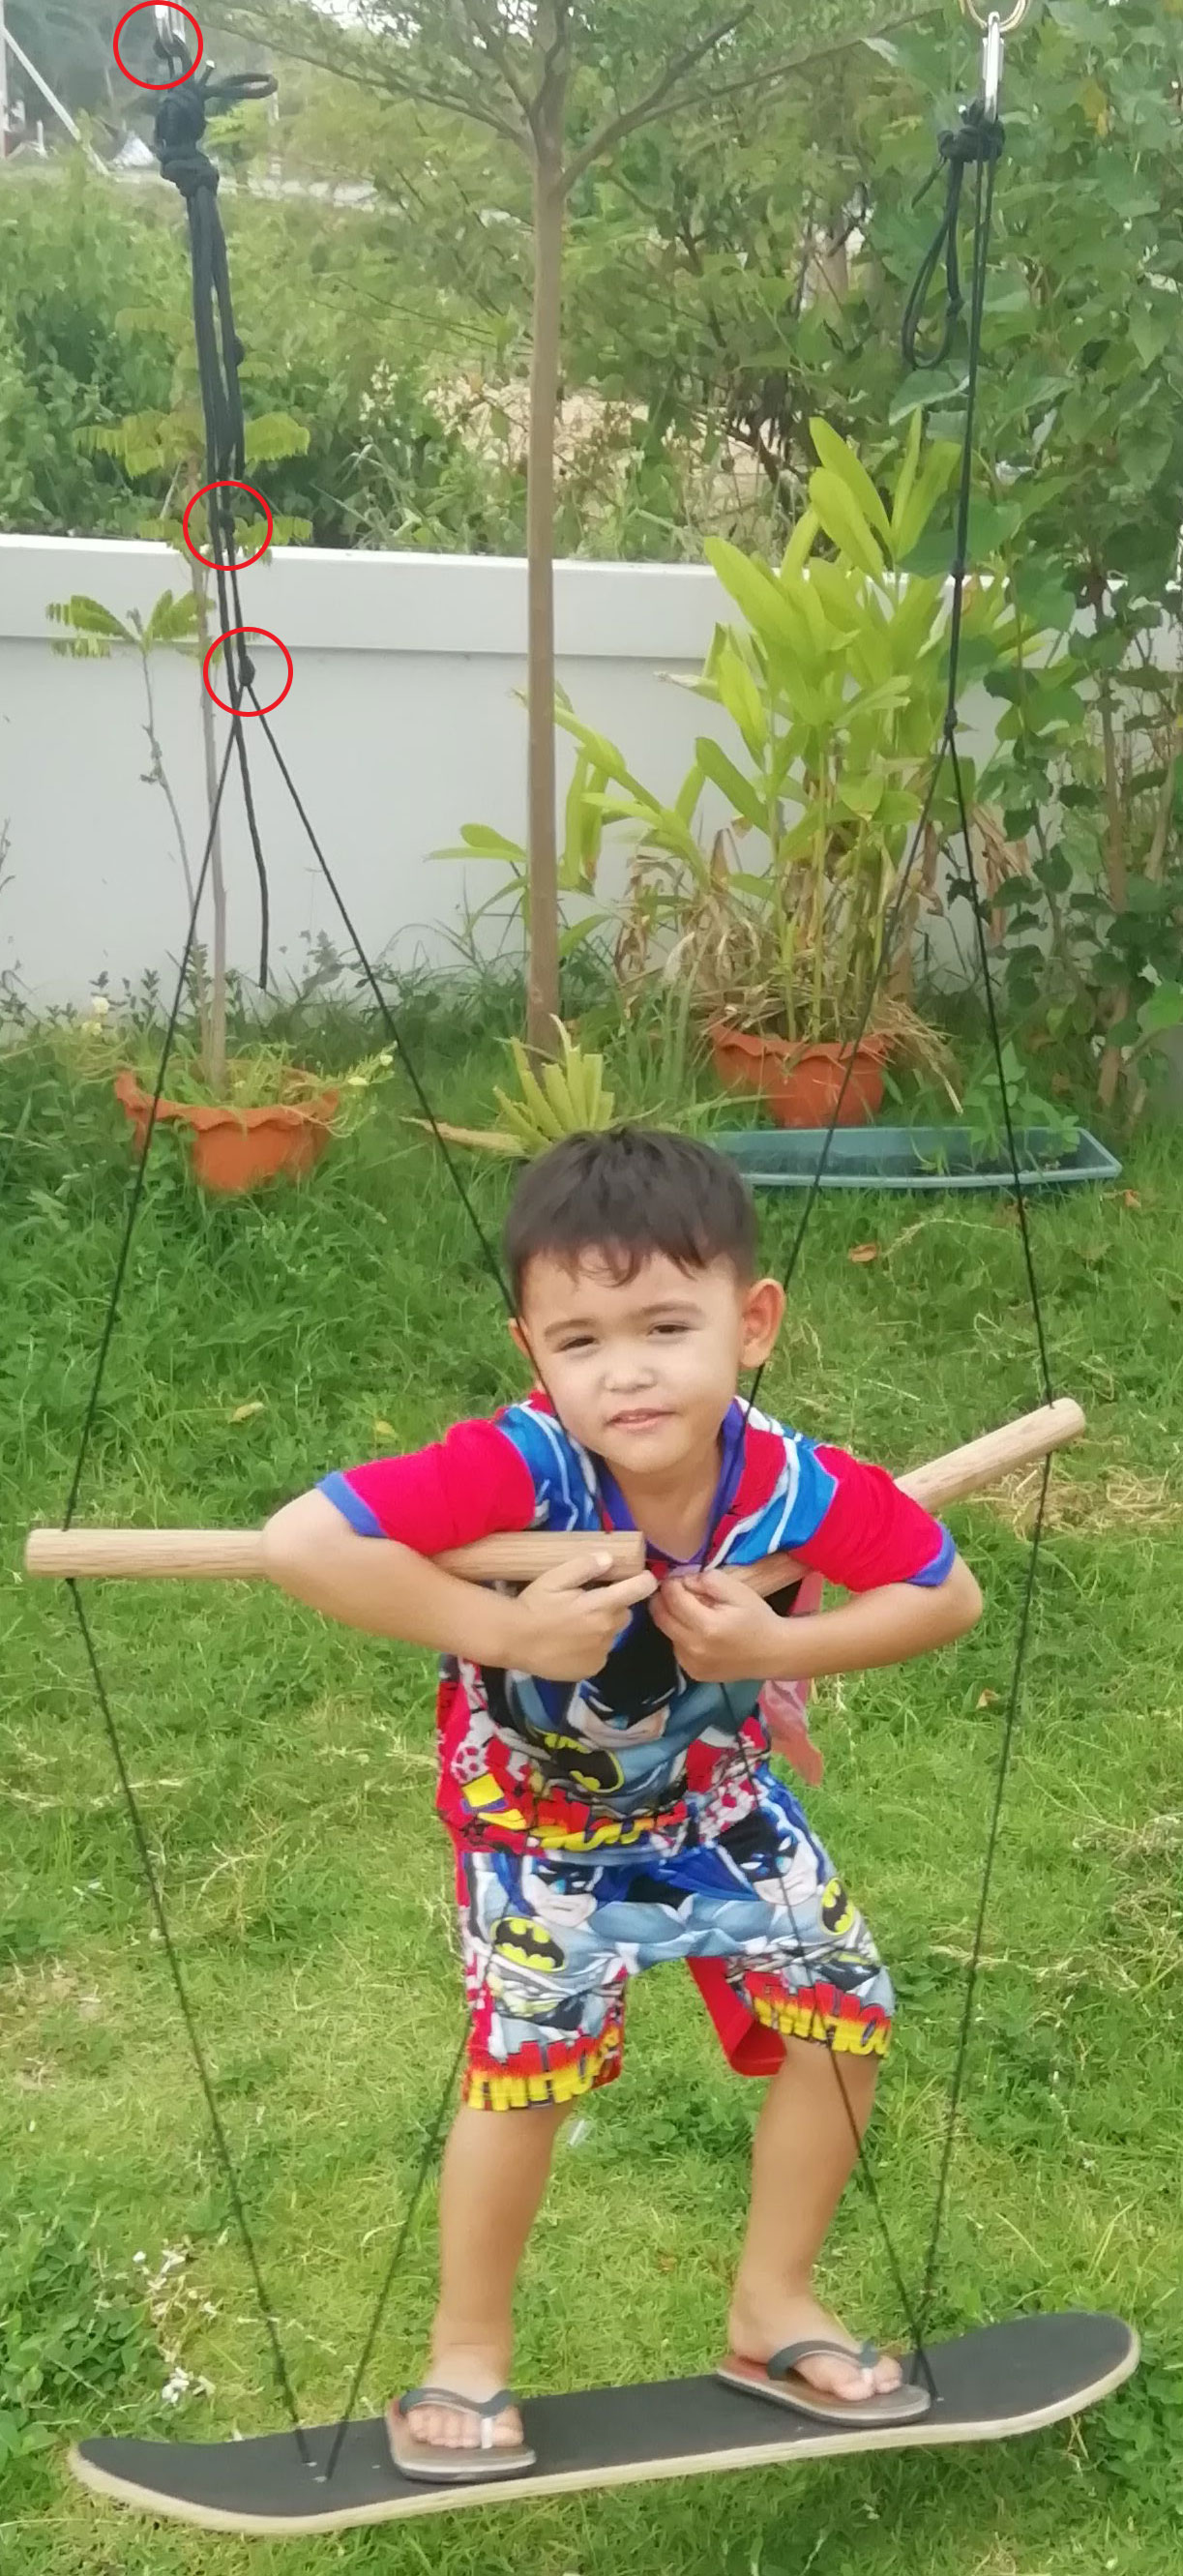
Working your way up, you'll tie the 2 sides of rope together. You'll do this multiple times along the length, where you want the ropes to form a triangle shape, and where you want to attach the carabiner. You can tie multiple knots, so you can swap the carabiner to a different knot to easily change the height.
Important Tips: Where you'll attach the carabiner, make sure there are 2 knots 1-2cm apart. The carabiner will attach between these knots, then it'll be unable to slide up and down the rope. And for safety, when choosing the distance between knots, the spaces should be small enough that a head cannot fit through.
Repeat with the other rope on the other end of the board. Attach your carabiners to a knot at a suitable height, then attach the carabiners to your swing set stand.
Step 7: Done Building!
It's ready to use. Check that the setup is suitably strong, at a safe height and unlikely to bump into anything, then get playing.Tip: Your skateboard may not be waterproof (eg. the glue in the wood, or the grip tape), so it can be brought under cover when not in use.
For more ideas, take a look at our Swings Category for more swings that your kids will enjoy.